
How to Pack a Kitchen for Moving (The Hardest Room)
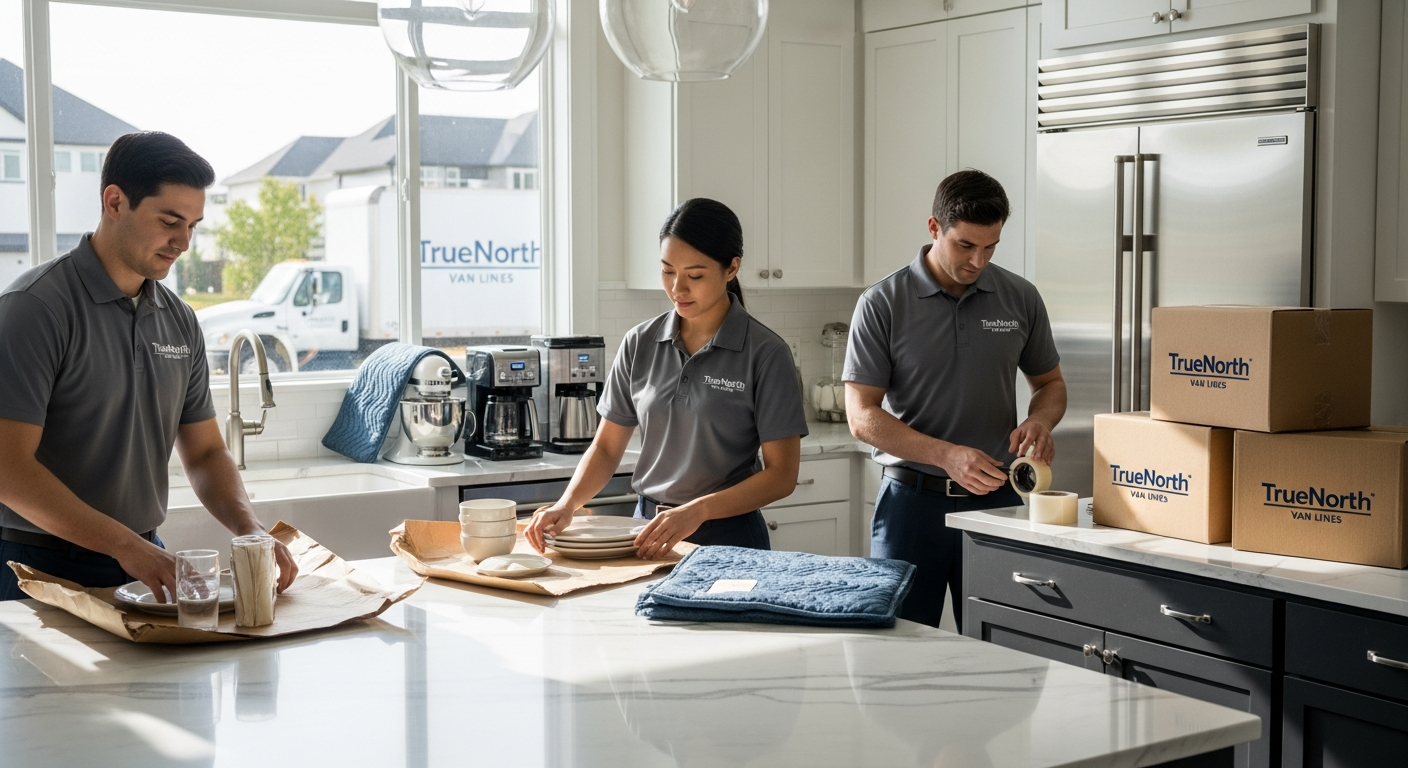
Packing a kitchen for moving is usually the hardest part of a household move. Cabinets are full of fragile dishes and glassware, drawers hide sharp knives and gadgets, and bulky items like mixers and air fryers compete for box space with cleaning supplies and pantry food. Without a plan, the kitchen can easily turn into a time-consuming, stressful project that delays the rest of your move.
With the right strategy, though, even the most packed kitchen can be organized, boxed, and labeled in a way that protects your belongings and keeps unpacking simple. As a professional moving company, TrueNorth Van Lines regularly helps customers turn a chaotic kitchen into neat, clearly labeled moving cartons that are ready for local and long-distance moves.
This guide walks you step-by-step through how to pack a kitchen for moving: what to do first, which supplies to use, how to protect dishes and glasses, how to handle pots, pans, appliances, food, and cleaning products, and how to decide what to handle yourself versus what to leave to professional packers. You will also find example timelines, cost factors, checklists, and common mistakes to avoid.
Use this as a working plan while you prepare your home. Whether you are moving across town using local moving services or relocating across state lines with long-distance moving services, a well-packed kitchen will make moving day smoother and safer.
Key takeaways
- Start packing your kitchen 7–10 days before moving day so you have time for decluttering, careful wrapping, and labeling.
- Use heavy-duty dish barrels or double-walled boxes with plenty of paper and cushioning for dishes, glasses, and stemware.
- Pack by category (rarely used items first, daily essentials last) and create a “first-night kitchen box” with basics you will need immediately.
- Never pack chemicals with food, and follow mover guidelines for items that cannot go on the truck, such as aerosols and open liquids.
- Label every box with room, contents, and priority level to make loading and unloading straightforward for you and your movers.
- Professional packing services can significantly reduce breakage risk and save time, especially for fragile or high-value kitchen items.
- Get written estimates and ask your mover how kitchen packing time and materials are billed before you book.
Why the kitchen is the hardest room to pack
Most people are surprised by how long it takes to pack a kitchen for moving. It looks like a single room, but in practice it contains more categories of items than almost any other part of the home:
- Fragile glassware, dishes, and serving pieces
- Heavy pots, pans, and cast iron that can break boxes if not packed correctly
- Small appliances with cords and many attachments
- Open food products, liquids, and spices
- Cleaning supplies, sprays, and chemicals
- Bulk pantry storage, paper goods, and plastic containers
On top of that, the kitchen is usually in active use right up until the last day before your move. That combination of complexity and daily use is what makes this room so challenging without a clear plan.
Understanding how to pack a kitchen for moving means breaking the job into manageable phases and choosing where it makes sense to bring in professional help, such as professional packing services from TrueNorth Van Lines.
Suggested timeline for packing your kitchen
Having a timeline helps you stay organized and prevents that last-minute scramble when movers are at the door. The schedule below assumes a typical household kitchen; adjust the pace up or down based on your kitchen size.
| Days before move | Tasks | Notes |
|---|---|---|
| 10–14 days | Declutter, sort rarely used items, plan meals to use up food. | Decide what not to move; gather packing supplies. |
| 7–9 days | Pack special-occasion dishes, extra cookware, serving pieces, and backup small appliances. | Leave out only what you use weekly. |
| 4–6 days | Pack most pantry items, extra utensils, baking supplies, and barware. | Keep daily meal items accessible. |
| 2–3 days | Pack dishes, glasses, remaining cookware, and nonessential small appliances. | Prepare your first-night box. |
| 1 day | Pack last essentials, food from pantry you will move, and most cleaning supplies. | Leave only a basic cleaning kit for move-out. |
If you plan to use professional packing services, your timeline will be shorter. Many customers schedule packers from TrueNorth Van Lines 1–2 days before moving day, especially for the kitchen and other fragile rooms.
Essential supplies for packing a kitchen
Packing a kitchen safely depends on having enough of the right materials. Skimping on paper or using boxes that are too large or flimsy is one of the most common causes of damage.
Recommended packing materials
- Small moving boxes (1.5–2.0 cubic feet) for heavy items like canned goods and dishes
- Medium moving boxes (3.0 cubic feet) for lighter cookware, plastic containers, and pantry items
- Dish barrels or double-walled boxes for plates, bowls, and glassware
- Cell kits / glass dividers for wine glasses and stemware, if available
- Unprinted packing paper for wrapping dishes and filling voids
- Bubble cushioning for very fragile or high-value items
- Stretch wrap for keeping appliance parts together and protecting doors and lids
- Sturdy tape and a tape dispenser
- Permanent markers for labeling boxes on multiple sides
- Zip-top bags for small parts, screws, and hardware
- Painter's tape for temporary labels or notes on appliances
Buying a little more material than you think you need is usually less expensive than dealing with broken dishes. TrueNorth Van Lines can provide moving-grade boxes and packing paper as part of our packing services or as a supply-only option in many service areas.
Declutter and decide what not to move
One of the most powerful ways to reduce stress, cost, and time is to move less. Kitchens are full of items we rarely use but pay to move anyway. Before you start wrapping, take time to declutter.
Items to consider leaving behind
- Chipped, cracked, or mismatched dishes and mugs
- Warped pans, scratched nonstick cookware, and lids with missing mates
- Duplicate gadgets or single-use tools you rarely touch
- Expired pantry items, spices, and baking supplies
- Excess plastic containers without lids or with stains
- Old water bottles, free promo cups, and low-quality barware
Set up three staging areas: keep, donate/give away, and dispose. Make quick decisions and avoid overthinking low-cost items.
Sample wording when coordinating with friends or neighbors: “We're moving soon and decluttering the kitchen. Would you like any of these extra baking pans or mugs before we donate them?”
Room-by-room strategy: what to pack first
When you plan how to pack a kitchen for moving, it helps to work by priority of use. Pack the least-used items first and save everyday essentials for last.
Step 1: Special-occasion and seasonal items
- Holiday platters and serving dishes
- Roasting pans, large buffet trays, punch bowls
- Seasonal cookie cutters and baking molds
- Formal china and rarely used glassware
These items can usually be packed 1–2 weeks before your move without affecting your daily routine.
Step 2: Backup and duplicate items
- Extra sets of dishes or glasses
- Spare small appliances (backup coffee maker, extra slow cooker)
- Additional pots, pans, or mixing bowls beyond your daily set
Step 3: Bulk pantry and infrequently used groceries
- Backup condiments, unopened oils, and rarely used spices
- Baking supplies used only a few times per year
- Bulk dry goods you will actually need after the move
Step 4: Everyday items and last-day essentials
These are the last things to go in boxes:
- Daily dishes, glasses, and silverware
- Primary pots and pans
- Everyday small appliances such as your main coffee maker or toaster
- Basic spices, oil, and pantry items you will use for meals before moving
As you narrow down your supplies in the last few days, you can switch to disposable plates and utensils to speed up final packing.
How to pack dishes and glassware safely
Dishes and glassware are the heart of most kitchen packing questions. They are fragile, heavy, and time-consuming to wrap correctly, but doing it right makes all the difference on moving day.
Packing plates and bowls
- Use small or dish barrel boxes so the weight stays manageable.
- Cushion the bottom of each box with a thick layer of crumpled packing paper (2–3 inches).
- Wrap each plate individually in 2–3 sheets of paper, then bundle sets of 3–4 for added strength.
- Place plates on edge, not flat, in the box. Vertical stacking helps absorb shocks.
- Repeat for bowls, filling gaps with more paper so nothing can shift.
- Add a final layer of crumpled paper on top before sealing.
Packing glasses and stemware
- Use boxes with dividers (cell kits) if possible; otherwise, create your own with sturdy paper and cardboard.
- Stuff crumpled paper inside each glass to support the shape.
- Wrap each glass fully, paying extra attention to stems and bases for wine glasses.
- Place heavier tumblers at the bottom, lighter and more delicate pieces on top.
- Finish each layer with additional cushioning to prevent movement.
Example packing configuration
| Box type | Items | Approx. quantity per box |
|---|---|---|
| Dish barrel | Dinner plates, salad plates, bowls (all wrapped) | 12–16 mixed pieces, depending on size |
| Small box with cell kit | Glasses, mugs, wine glasses | 12–24 pieces, depending on divider layout |
| Medium box | Serving platters, odd-shaped ceramics, pitchers (heavily padded) | 5–10 pieces with lots of paper |
If you prefer not to handle this level of detailed wrapping, you can book full or partial kitchen packing with TrueNorth Van Lines. Our crews bring professional-grade dish barrels, paper, and dividers to help protect your kitchenware.
How to pack pots, pans, and bakeware
Pots and pans may not be as fragile as glassware, but they are heavy, oddly shaped, and can easily damage other items if packed improperly.
Nesting and stacking cookware
- Group pots and pans by size and nest them together to save space.
- Place a sheet of packing paper or thin cardboard between nesting pieces to prevent scratching.
- Wrap glass lids separately with paper or bubble cushioning, and store them vertically on the side of the box.
- Use medium boxes so the total weight stays manageable for safe lifting.
Cast iron and heavy items
- Wrap cast iron skillets and Dutch ovens fully in paper or bubble cushioning.
- Pack them in the bottom of a small or medium box only; never mix them with fragile dishes.
- Limit the number of heavy pieces in one box to prevent break-through and injuries during handling.
Bakeware and sheet pans
- Nest baking sheets, cooling racks, and muffin pans together with paper between them.
- Place them vertically on the side of a box or flat at the bottom with light items on top.
- Wrap fragile pie dishes and glass baking pans as you would plates, with generous padding.
How to pack small and large kitchen appliances
Appliances require special attention because they combine weight, glass components, moving parts, and (sometimes) removable cords or attachments.
Packing small appliances
- Unplug appliances and wipe them clean. Let any that hold moisture (coffee makers, kettles) dry completely.
- Remove loose parts, blades, and attachments when possible, and wrap them separately.
- Place small parts in labeled zip-top bags and tape those to the main appliance or pack them in the same box.
- Use original boxes if you still have them in good condition; otherwise, choose a small box with plenty of paper.
- Wrap the appliance in several layers of packing paper or bubble cushioning, then cushion all sides inside the box.
Preparing large appliances for moving
Large appliances such as refrigerators, stoves, and dishwashers may require professional disconnection and preparation. Movers can often transport them, but they typically cannot disconnect gas lines or modify home wiring.
- Empty and defrost refrigerators and freezers at least 24 hours in advance.
- Secure or remove shelves and drawers and pack them separately if needed.
- Clean ovens and stovetops, removing detachable grates and burners.
- For washing machines or dishwashers located near the kitchen, secure hoses and internal drums according to manufacturer instructions.
Discuss any large appliances during your quote process so your mover can explain what services are included and what needs to be handled by a licensed technician.
Packing pantry food and cleaning supplies
Food and chemicals require extra planning because of spill and contamination risks.
Packing pantry items
- Prioritize moving only unopened, nonperishable, and non-glass containers.
- Use small boxes for canned goods; they become heavy very quickly.
- Seal open dry goods (flour, sugar, rice) in sturdy containers or double-bag them to prevent leaks.
- Avoid packing items in glass jars unless they are well wrapped and cushioned.
- Do not move perishable items that must be refrigerated or frozen unless you are using a cooler for a short local move.
Packing cleaning products and chemicals
Most moving companies, including TrueNorth Van Lines, follow safety guidelines about what can go on the truck. Many hazardous items cannot be transported.
- Check labels for words such as flammable, combustible, corrosive, or explosive.
- Set aside aerosols, bleach, ammonia, and other strong chemicals; plan to use them up or dispose of them safely.
- Move only tightly sealed cleaning products that are allowed on the truck, and pack them upright in a lined plastic tote or box.
- Never pack chemicals in the same box as food or kitchen textiles.
If you are unsure whether an item can be moved, ask your moving coordinator when you book your move.
Labeling, inventory, and box organization
Even careful packing can create headaches if boxes are not clearly labeled. Taking a few extra seconds per box will save you time and frustration at delivery.
Label each box clearly
- Write the room (“Kitchen”) and a short description of contents on at least two sides and the top.
- Mark boxes as “FRAGILE” and “THIS SIDE UP” when appropriate.
- Consider using a simple priority code: “1” for open first, “2” for mid-priority, “3” for long-term storage.
Create a simple kitchen inventory
You do not need a complex spreadsheet unless you want one. A basic list is often enough. For example:
“Kitchen-01: Everyday dishes and bowls; Kitchen-02: Glasses and mugs; Kitchen-03: Pots, pans, and lids; Kitchen-04: Pantry canned goods.”
An organized labeling system helps your movers place boxes in the right spaces at your new home and makes it easier to spot anything missing.
Example labeling and priority system
| Box label | Contents | Priority |
|---|---|---|
| Kitchen-01: Everyday dishes | Dinner plates, bowls, side plates | 1 – Open first |
| Kitchen-03: Pots & pans | Core cookware set, lids | 1 – Open first |
| Kitchen-06: Special-occasion china | Formal place settings, serving pieces | 3 – Open later |
What affects the cost of packing and moving a kitchen
Many customers want to understand how a packed kitchen will impact their overall moving price. Costs vary by move type, home size, and service level, but several common factors apply.
Main cost drivers
- Volume and weight: More boxes and heavier items mean more labor and truck space.
- Fragility: Extra wrapping and careful handling for dishes, glassware, and high-end appliances add time.
- Access: Stairs, long carries, and tight hallways can increase labor time.
- Service level: Full-service packing for the kitchen versus partial packing or DIY.
- Distance: Local moves are usually billed differently than long-distance or interstate moves.
Example cost influences for kitchen packing
| Factor | How it affects price | What you can do |
|---|---|---|
| Number of kitchen boxes | More boxes mean more time to pack, load, and unload. | Declutter before packing and use space efficiently. |
| Professional packing vs. DIY | Pro packing adds labor and materials but can reduce damage risk. | Consider partial packing: pros handle fragile items only. |
| Move type (local vs. long distance) | Pricing structures differ by distance and regulations. | Ask for a detailed written estimate for your move type. |
TrueNorth Van Lines provides transparent estimates that outline labor, materials, and any packing services you select. For planning purposes, you can also explore our moving cost calculator to get a ballpark idea of how kitchen volume might affect your overall price.
How to prepare your kitchen before movers arrive
Even if you are doing most of your own packing, a little preparation right before moving day helps the crew work efficiently and safely.
Day-before checklist
- Finish packing all nonessential kitchen items into sealed, labeled boxes.
- Set aside a clearly labeled “First-Night Kitchen” box with basics (see below).
- Empty, clean, and dry small appliances that are going on the truck.
- Defrost and empty the refrigerator and freezer if they are being moved.
- Gather any items that are not allowed on the truck (such as aerosols) in a separate area to handle yourself.
First-night kitchen box
Think about what you will want immediate access to in the first 24 hours at your new home. Typical items include:
- Paper plates, cups, and plastic utensils
- One small pot and pan, plus a spatula and serving spoon
- Dish soap, a sponge, and a dish towel
- Trash bags and a roll of paper towels
- Coffee maker or kettle, coffee/tea, and a couple of mugs
- Basic snacks, salt, pepper, and cooking oil
Label this box clearly: “Kitchen – First Night – Open First.” Consider keeping it in your car instead of on the moving truck.
Choosing between DIY packing and professional packing services
When planning how to pack a kitchen for moving, one of the biggest decisions is how much to do yourself versus how much to delegate to professionals. There is no one right answer; the best choice depends on your timeline, budget, and comfort level.
DIY kitchen packing: pros and cons
| Option | Advantages | Considerations |
|---|---|---|
| DIY kitchen packing | Lower direct costs; full control over how items are packed and organized. | Takes significant time; risk of breakage if materials or methods are not adequate. |
| Full professional packing | Fast and efficient; crews use professional materials and techniques; reduces physical strain. | Higher cost; you will need to communicate labeling and organization preferences. |
| Partial packing (fragile items only) | Balances cost and protection; you pack simple items, movers pack dishes and glassware. | Requires coordination on which boxes you want the crew to handle. |
At TrueNorth Van Lines, you can choose from full-service packing for your entire home, kitchen-only packing, or fragile-only service for items like dishes, wine glasses, and specialty cookware. Many customers who are comfortable packing linens and clothing prefer professionals for the kitchen because it is the most complex room.
Helpful TrueNorth Van Lines services
Key questions to ask your movers about kitchen packing
As you compare moving estimates, ask each company the same set of questions so you can make an informed choice.
- Do you offer full or partial kitchen packing services, and how are they billed?
- Are packing materials (boxes, paper, tape) included or charged separately?
- Which kitchen-related items are you not allowed to transport (cleaners, aerosols, propane, etc.)?
- How do you handle high-value fragile items such as fine china or crystal?
- Can I pack some kitchen boxes myself and have your crew pack the rest?
- How do you label kitchen boxes, and can you follow my labeling system?
Sample wording when speaking with a mover: “Most of my concerns are about how to pack a kitchen for moving, especially the dishes and glassware. Can you walk me through how your crew typically handles that?”
What to keep with you on moving day
Certain kitchen-related items are either not allowed on the moving truck or are simply more convenient to keep with you.
Kitchen items to transport yourself when possible
- Daily medications and any refrigerated medicines (use a cooler if necessary)
- Important documents you may store in the kitchen (warranties, appliance manuals)
- High-value or sentimental kitchen items you would prefer to keep close
- Essential snacks and drinks for moving day
- Your first-night kitchen box, if space allows in your vehicle
For long-distance moves, especially, keeping key items with you can make travel days and the first few nights more comfortable while you wait for delivery.
How TrueNorth Van Lines can help with kitchen packing
TrueNorth Van Lines provides residential and commercial moving services, including local and long-distance relocations. Our crews regularly handle complex kitchen setups in apartments, houses, and offices, and we understand how much planning and care this room requires.
When you contact our team, we can help you:
- Estimate how many kitchen boxes you will need based on your home size
- Decide whether DIY, partial, or full professional packing is the best fit
- Schedule packing and moving dates to match building access or elevator reservations
- Coordinate short- or long-term storage if your kitchen items need to be held between homes
If you are planning a move and want professional support for the most challenging room in the house, you can visit our moving services overview, check your service area, explore the moving cost calculator, or request a free moving quote to discuss your kitchen and the rest of your home.
Frequently asked questions
How far in advance should I start packing my kitchen?
It is best to start packing your kitchen 7–10 days before moving day. Begin with rarely used items and seasonal pieces, then work toward everyday dishes and cookware as you get closer to your move. This timeline allows you to keep the kitchen functional while still packing methodically.
What is the best way to pack plates for moving?
Wrap each plate carefully in 2–3 sheets of packing paper, then place plates on edge in a dish barrel or small box with a cushioned bottom and top. Avoid stacking plates flat, and fill all gaps with paper so nothing can shift while in transit.
How do I pack glasses and wine glasses without breaking them?
Use cell kits or dividers when available. Stuff paper inside each glass, wrap it fully, and place heavier pieces on the bottom layer with lighter stemware on top. Add plenty of cushioning between layers and at the top of the box, and mark the box as fragile.
Can movers pack my whole kitchen for me?
Yes, many moving companies, including TrueNorth Van Lines, offer full-service packing options for the entire home or just specific rooms like the kitchen. Crews bring professional materials and can often complete a kitchen in a fraction of the time it takes to pack it yourself.
Which kitchen items cannot go on the moving truck?
Most movers cannot transport flammable, explosive, or corrosive items. In the kitchen, this often includes aerosols, certain cleaning chemicals, propane cylinders, and charcoal. Ask your mover for a list of non-allowable items before you pack.
How many boxes will I need to pack a typical kitchen?
The number of boxes depends on your kitchen size and how much you own, but many households use 10–20 kitchen-specific boxes, including dish barrels, small boxes for canned goods, and medium boxes for cookware and pantry items.
Is it worth paying for professional packing just for dishes and glassware?
For many people, yes. Dishes and glassware are time-consuming to wrap correctly and are the most likely items to break in a move. Having professionals handle only the fragile items can be a good compromise between cost and peace of mind.
How should I pack pantry food for a long-distance move?
Limit what you move to unopened, nonperishable items in sturdy containers. Avoid glass jars when possible, double-bag open dry goods, and avoid perishable or temperature-sensitive food. For long distances, some customers choose to donate most pantry items and restock at the new home.
What should go in my first-night kitchen box?
Include essentials you will want immediately: disposable plates and utensils, one small pot and pan, a few cooking tools, dish soap, a sponge, paper towels, trash bags, basic snacks, and coffee or tea with your preferred brewing method.
How can I reduce the cost of packing and moving my kitchen?
Declutter before you pack, focus professional packing on only the most fragile or valuable items, and be ready on moving day so the crew can work efficiently. Clear labeling and good access (hallways, elevators, parking) can also help control labor time.
Sources referenced in this guide
When outlining how to pack a kitchen for moving, this guide reflects practical experience from professional moving crews and commonly referenced industry materials, including:
- Federal Motor Carrier Safety Administration consumer guidance on household moves
- U.S. Department of Transportation moving guidance and best practices
- State transportation and consumer protection agency recommendations on non-allowable items
- Written moving estimates, bills of lading, and carrier service agreements
- Manufacturer instructions for preparing household appliances for transportation
- Building management move-in and move-out rules regarding elevators, loading docks, and access windows
This guide is general moving information, not legal, insurance, or regulatory advice. Moving requirements, pricing, access rules, and coverage options may vary by location, move type, building rules, and service agreement.